配置模板
Nginx UI Template 提供了一种开箱即用的配置模板机制。在 NgxConfigEditor 中,我们设计了一个可视化界面,使用户能够方便地插入模板中的配置到当前的配置文件中。 在本篇指南中,我们将绍这种配置模板的文件格式和语法规则。 配置模板文件存储在 template/block 目录中,我们欢迎并期待您通过提交 PR 的形式分享您编写的配置模板。
提示
请注意,每次修改或添加新的配置文件后,需要重新编译后端以生效。
文件格式
Nginx UI Template 文件由两部分组成:文件头部以及具体的 Nginx 配置。
以下是一个关于反向代理的配置模板,我们将以这个模板为基础为您介绍 Nginx UI Template 的文件格式及相关语法。
# Nginx UI Template Start
name = "Reverse Proxy"
author = "@0xJacky"
description = { en = "Reverse Proxy Config", zh_CN = "反向代理配置"}

[variables.enableWebSocket]
type = "boolean"
name = { en = "Enable WebSocket", zh_CN = "启用 WebSocket"}
value = true

[variables.clientMaxBodySize]
type = "string"
name = { en = "Client Max Body Size", zh_CN = "客户端最大请求内容大小"}
value = "1000m"

[variables.scheme]
type = "select"
name = { en = "Scheme", zh_CN = "协议"}
value = "http"
mask = { http = { en = "HTTP" }, https = { en = "HTTPS" } }

[variables.host]
type = "string"
name = { en = "Host", zh_CN = "主机"}
value = "127.0.0.1"

[variables.port]
type = "string"
name = { en = "Port", zh_CN = "端口"}
value = 9000
# Nginx UI Template End

# Nginx UI Custom Start
{{- if .enableWebSocket }}
map $http_upgrade $connection_upgrade {
    default upgrade;
    '' close;
}
{{- end }}
# Nginx UI Custom End

if ($host != $server_name) {
    return 404;
}

location / {
        {{ if .enableWebSocket }}
        proxy_http_version 1.1;
        proxy_set_header Upgrade $http_upgrade;
        proxy_set_header Connection $connection_upgrade;
        {{ end }}

        client_max_body_size {{ .clientMaxBodySize }};

        proxy_redirect off;
        proxy_set_header Host $host;
        proxy_set_header X-Real-IP $remote_addr;
        proxy_set_header X-Forwarded-For $proxy_add_x_forwarded_for;
        proxy_set_header X-Forwarded-Proto $scheme;

        proxy_pass {{ .scheme }}://{{ .host }}:{{ .port }}/;
 }
文件头部
文件头部应该包含在 # Nginx UI Template Start 和 # Nginx UI Template End 之间,遵循 toml 语法。
文件头部包含以下字段:
| 字段 | 描述 | 类型 | 必要 |
|---|---|---|---|
name | 配置的名称 | string | 是 |
author | 作者 | string | 是 |
description | 描述,使用 toml 格式的字典来实现多语言描述 | toml 字典 | 是 |
variables.变量名称.type | 变量类型,目前支持 boolean, string 和 select | string | 是 |
variables.变量名称.name | 变量显示的名称,是一个 toml 格式的字典,用于支持多语言 | toml 字典 | 是 |
variables.变量名称.value | 变量的默认值 | boolean/string (根据 type 定义) | 否 |
variables.变量名称.mask | 选择框的选项 | toml 字典 | 否 |
示例如下:
# Nginx UI Template Start
name = "Reverse Proxy"
author = "@0xJacky"
description = { en = "Reverse Proxy Config", zh_CN = "反向代理配置"}

[variables.enableWebSocket]
type = "boolean"
name = { en = "Enable WebSocket", zh_CN = "启用 WebSocket"}
value = true

[variables.clientMaxBodySize]
type = "string"
name = { en = "Client Max Body Size", zh_CN = "客户端最大请求内容大小"}
value = "1000m"

[variables.scheme]
type = "select"
name = { en = "Scheme", zh_CN = "协议"}
value = "http"
mask = { http = { en = "HTTP" }, https = { en = "HTTPS" } }

[variables.host]
type = "string"
name = { en = "Host", zh_CN = "主机"}
value = "127.0.0.1"

[variables.port]
type = "string"
name = { en = "Port", zh_CN = "端口"}
value = 9000
# Nginx UI Template End
其中,名称、作者及描述将会以摘要的形式在配置列表中显示。

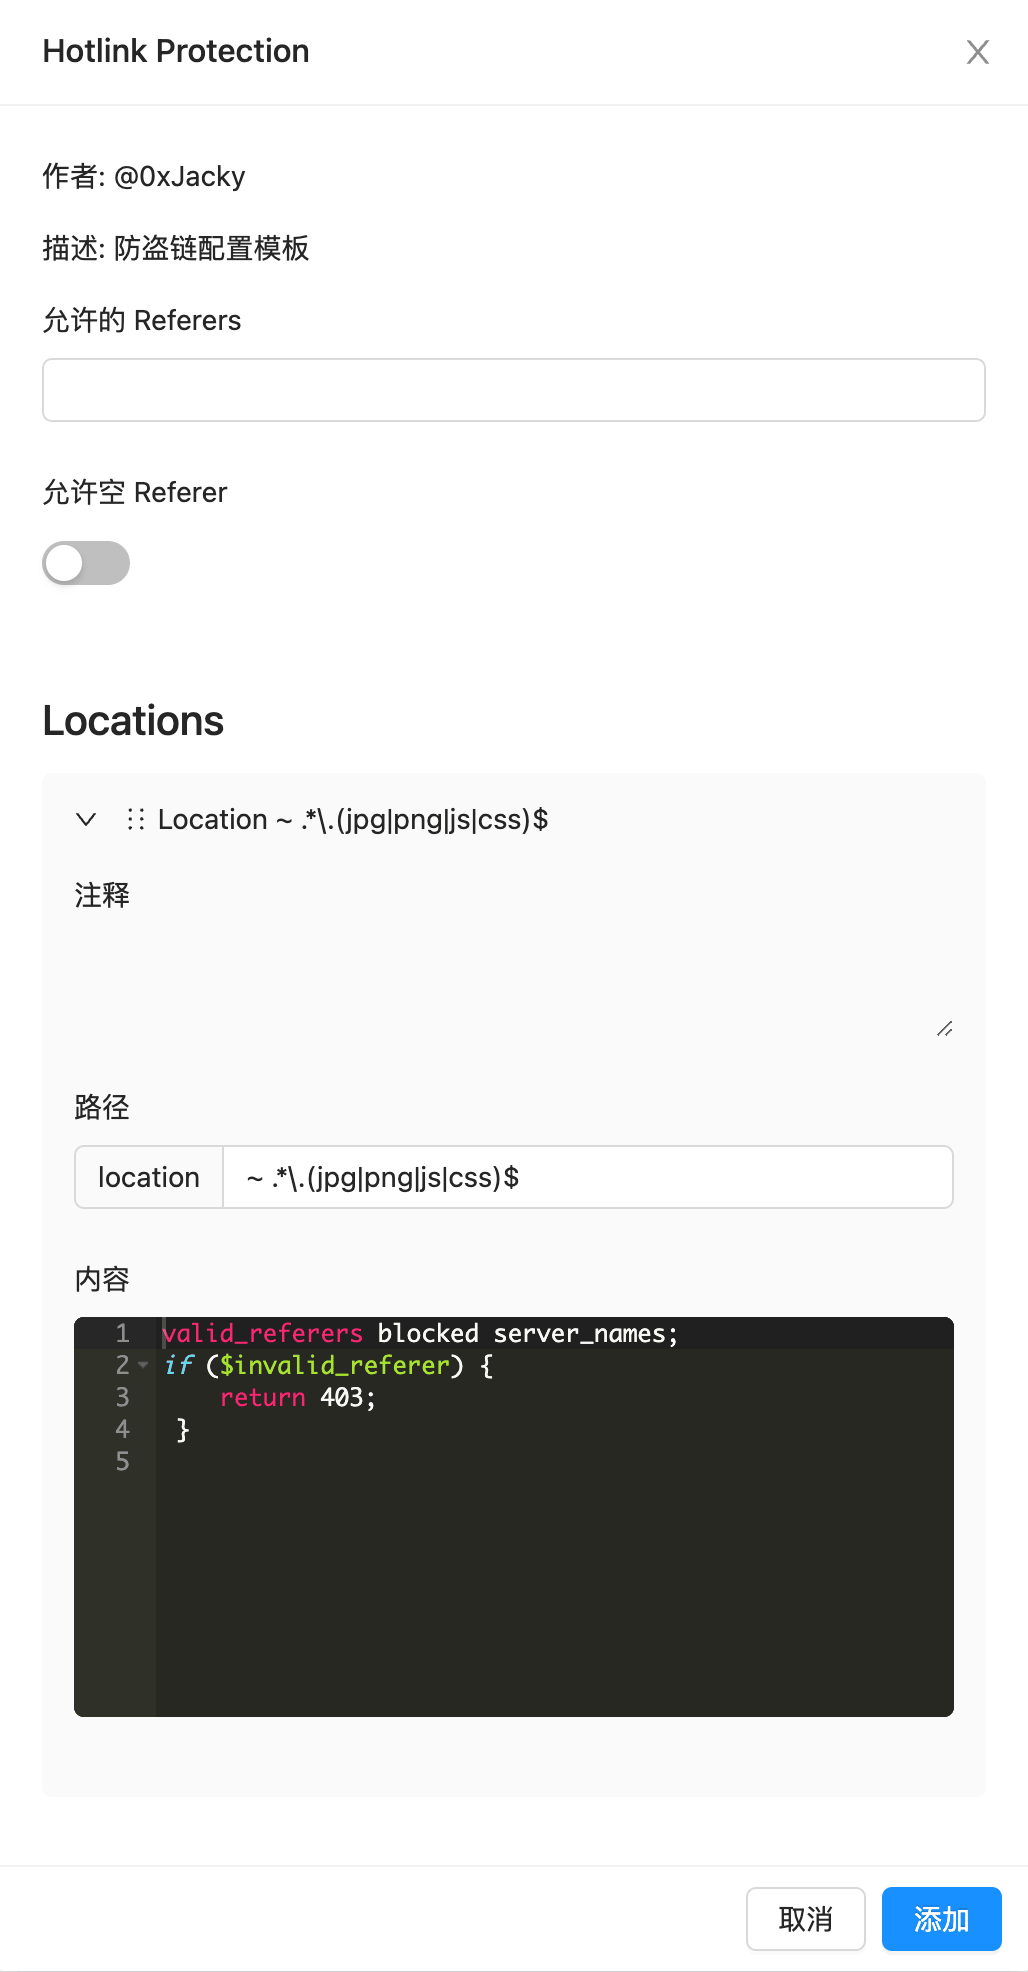
当您点击「查看」按钮,界面会显示一个对话框,如下图所示。

下表展示了变量类型与用户界面元素的关系:
| 类型 | 用户界面元素 |
|---|---|
boolean | 开关 |
string | 输入框 |
select | 选择框 |
Nginx 配置
Nginx 配置应该在文件头部之后提供,这部分将使用 Go 的 text/template 库进行解析。这个库提供了强大的模板生成能力,包括条件判断、循环以及复杂的文本处理等。 具体语法可以参考 Go 文档。
在头部中定义的变量可以在这部分中使用,如 .NoneReferer 和 .AllowReferers。请注意,需要预先在头部定义变量,才能在这部分中使用。
示例如下:
location / {
        {{ if .enableWebSocket }}
        proxy_http_version 1.1;
        proxy_set_header Upgrade $http_upgrade;
        proxy_set_header Connection $connection_upgrade;
        {{ end }}

        client_max_body_size {{ .clientMaxBodySize }};

        proxy_redirect off;
        proxy_set_header Host $host;
        proxy_set_header X-Real-IP $remote_addr;
        proxy_set_header X-Forwarded-For $proxy_add_x_forwarded_for;
        proxy_set_header X-Forwarded-Proto $scheme;
        proxy_set_header Forwarded $proxy_add_forwarded;

        proxy_pass {{ .scheme }}://{{ .host }}:{{ .port }}/;
 }
当用户修改前端的表单后,系统将会根据用户的输入和配置模板自动生成新的配置内容。
除了模板头部定义的变量,我们还提供了宏定义的变量,如下表所示:
| 变量名 | 描述 |
|---|---|
| HTTPPORT | Nginx UI 监听的端口 |
| HTTP01PORT | 用于 HTTP01 Challenge 的端口 |
上述变量可以直接在配置部分使用,无需在头部定义。